


Hugo is a website framework that I decided to use this past week for a short project and, afterwards, liked it so much I’ve decided to rework this blog with it. Here’s a few of the quick lessons I had as a first-time user.
You can read the finer points here, but the gist is:
- static file based CMS/website/whatever you want
- pluggable themes
- Markdown-based content
- Go-based templates
Development tool of choice
Being a .net developer for so long, my standard tool of choice is Visual Studio–for all of the love and pain that it brings.

As I’ve been spending more time in Python, node.js, and Go lately, Visual Studio Code is my preferred editor. It’s super fast and lightweight, the extension ecosystem is stellar, and I can use one editor for all of those environments seamlessly.
I’d like to point out that the Insider build has one feature that is near to my heart–the ability to drag-and-drop files out of folders and your desktop directly into the workspace explorer. This is a HUGE time saver for me and, I hope, finds its way into the release build soon. For now, the Insider build works like a champ (YMMV!).
Setting up on Heroku
I host all of my smaller projects up on Heroku. I could use github pages for this (and may still), but it’s nice to know Heroku is there and super simple. To use the Hugo buildpack on Heroku, you’ll need to specify it when creating your instance.
For full details, check out https://github.com/roperzh/heroku-buildpack-hugo.
FULL STOP: UPDATE on Heroku using Hugo+Python
So, as a technical blogger, I wanted access to the code highlighting shortcodes. That requires adding in Python and pygments via pip. Easy enough.
Adding Pygments and Python are super easy. Assuming you already have Python installed for your system and you’re running in an existing virtualenv, run pip install pygments and then pip freeze > requirements.txt in the root of your site. The requirements.txt file will take care of the rest.
The last step is to have a runtime.txt with the version of Python you prefer. 3.6.2 is a minor version behind, but is supported most everywhere I’ve built and published.
Until it’s not.
After an embarrassing amount of time trying to get Python AND Hugo to play nicely, I gave up and chugged over to Netlify. In my hunting for a Heroku fix, I’d come across several articles talking about how amazing it worked and you could get started for a free plan similar to Heroku.
Why not!? Soo….
Setting up on Netlify
Netlify is a free service that works via github rather than their own repository system. Frankly, that’s pretty stellar and saves the weird double master issue that Heroku can cause if you don’t keep things in sync. After setting up a free account, I linked it to github, tagged the repository, and added the hugo build command.
BOOM. Failed.
- repository read and download? yep!
- submodule for theme pulled down? yep!
- python version working? nope!
- This seems to be a bug in their system (their build paths are wrong, but wasn’t the root cause, so stepping over it for now)
- requirements.txt found and installed? yep!
hugocommand running? yep!- templates built? nope!
- full crash
wut? =(
After a great DEAL of trial and error, I noticed their documentation was pointing at Hugo 0.14. I’m using Hugo 0.30.2.
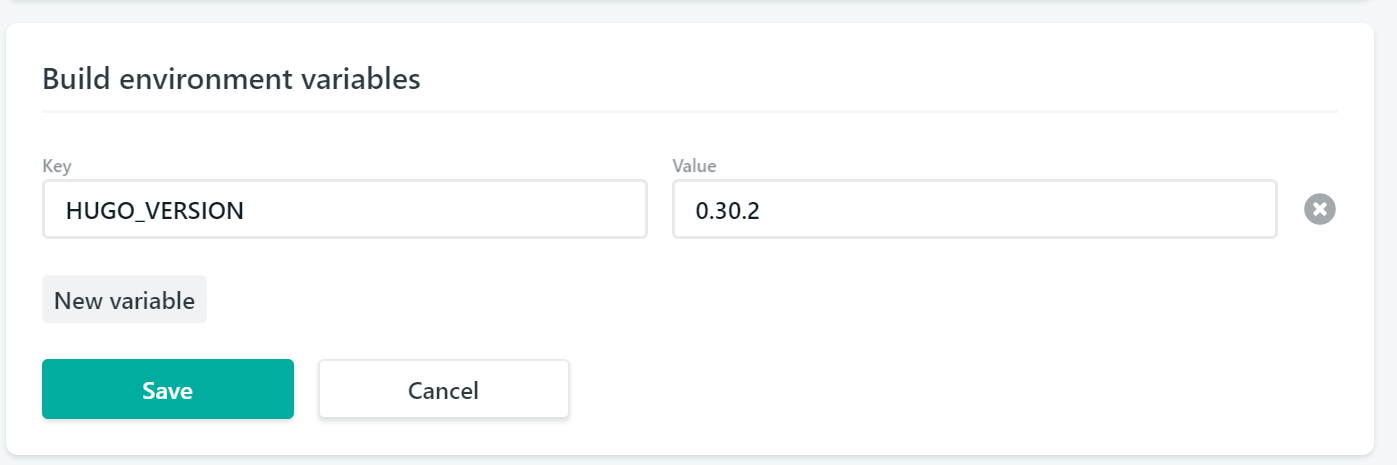
The fix? In Netlify’s control panel, go into your app’s Settings > Build & deploy > Continuous Deployment > Build environment variables.
Set a new variable called HUGO_VERSION to the version you’re using. That forces it to download that exact version and build your site.
Boom! Success! Now, back to the customization good stuff!
Overriding a theme’s template
I really like the templating system in Hugo and some of the themes are brilliant, but I like adding my own twists. That seems awkward off the bat if you’re adding your theme as a git submodule (which you should) as you can’t edit it very easily. The key is to add your own layouts directory.
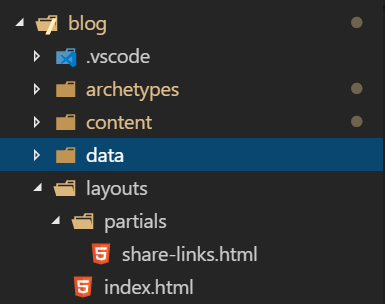
Step #1: Create a new layouts directory
Under your Hugo site project, create a new \layouts directory if one doesn’t already exist.
Step #2: Copy the theme’s template into layouts, matching the directory structure
If, for example, I wanted to update this site’s \layouts\partial\share-links.html to my own code, I’d create the \layouts\partial subdirectory and copy share-links.html from the theme folder into it.
Step #3: Edit your new ’localized’ theme file and profit!
Hugo will automatically use whatever’s in \layouts\* over your theme, so no additional backend wiring is needed. Edit according to your needs and publish.
NOTE: If you are constantly swapping out themes, keep in mind that your local layouts won’t get updated, so you could throw things off until you pull in and modify the new theme’s matching files.
Customizing the default ’new post’ file
When you run hugo new {file}.md, it reads the default from the \archetypes\{default}.{extension} (in this case default.md for a Markdown file).
If your theme supports a lot more metadata than the archetype default or you want to add custom fields, you can edit the default.md to include those so they’re added every time you run hugo new for that extension. It’s a huge time saver!
Control your summaries!
In your theme pages, Hugo uses .Summary to print out a summary of your post. You can control how deep it goes into your page with <!--more--> tag on your content page. The spacing is very picky on this one!
A generic intro paragraph goes here.  A short blurb of interesting stuff to read.
<!--more-->

This next bit of content and beyond doesn't show up in the summary list views.
Running local without cache
hugo server starts a webserver at https://localhost:1313 (by default) for testing and wires up the autoreload, allowing you to design, code, and create your posts and your browser updates on save. It’s a beautiful thing.
However, a few times in testing, the local cache of the Hugo server caught me.
Here’s a few flags that work well for me:
-Dincludes content marked as draft (by default, when you add a new post, it defaults to ‘draft’ and is hidden)--noHTTPCachedisables the HTTP cache headers--disableFastRenderturns off the fast rendering and causes the whole site to rebuild on change
The shortcodes are your friend!
Hugo comes with an array of shortcodes built in to display everything from a YouTube video, Tweet, or highlight and format your code examples.
Be sure to check them out at https://gohugo.io/content-management/shortcodes/.
In addition, check your theme’s documentation as it may have additional shortcodes provided.
That’s it for now! If you have any tips or tricks, be sure to leave a comment!
Adding custom page-level parameters to your templates
When I’m curating a piece of content, I like to have a standard format for how I refer back to the original owner source. With Hugo, it seemed like a page-level parameter would be a good spot for that content with a bit of updating to the output template.
Here we’ll use a few of the tips we’ve already covered.
Step #1: Add the custom parameter into your archetypes template.
In this case, I’ll call it sourceUrl.
---
title: "{{ replace .TranslationBaseName "-" " " | title }}"
date: {{ .Date }}
#snip out excess stuff
sourceUrl: ""
---
Step #2: Find and localize the content template where you’ll use your parameter.
For my theme, the content page is located at \layouts\post\content-single.html. Yours may vary on your theme and, depending on how complex your theme is with nesting, it could take a few tries to find the right one.
Once you know which one you’re working with, copy it into your local \layouts directory matching the hierarchy in your theme.
Step #3: Implement the usage of the parameter
Each .Page object contains a dictionary of your parameters via the .Params property. I prefer to call this within an if statement just to be safe
{{ if .Page.Params.sourceUrl }}
  <div id="source">
    View original source at <a href="{{ .Page.Params.sourceUrl }}">{{ .Page.Params.sourceUrl}}</a>
  </div>
{{ end }}
Step #4: Add the parameter to an existing page and test
By specifying a sourceUrl: "https://www.google.com", I now see that appended to my pages via my template. On pages without the parameter set, nothing shows up (and no error!)
That’s it for now. Check back soon for more tips and tricks. If you have your own, leave a comment and share!